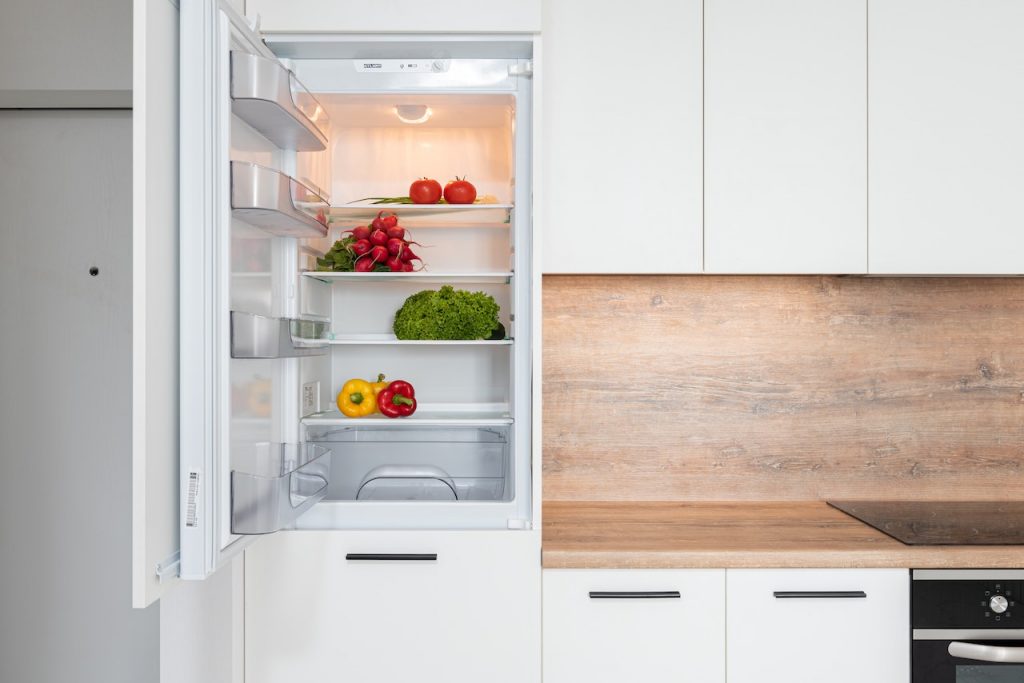
Do the contents of your fridge drawers look like a cluttered mess? Do you feel overwhelmed every time you open them to find something? When it comes to cleaning and organizing, there’s nothing worse than having inadequate storage space. But do you have any idea how to clean fridge drawers?
Fortunately, improving the cleanliness of your refrigerator does not need to be daunting. With some simple tips and tricks, you can easily transform those chaotic fridge drawers into neat compartments where everything is right at hand!
In this blog post, we’ll discuss how to effectively clean and organize the inside of your favorite food storage appliance. Keep reading for an easy four-step guide that will get rid of built-up gunk while keeping all your ingredients in their proper places. Ready to take on the challenge? Let’s start tidying up!
Why A Dirty Refrigerator Bad For Your Health

Keeping a clean refrigerator is essential for maintaining healthy eating habits. Not only does it help reduce food waste, but it also helps keep bacteria and other hazardous substances away from your food. Here are some reasons why a dirty refrigerator can harm you and your family’s health.
❌Mold Growth
Another major concern with having a dirty refrigerator is mold growth. Mold can grow on any surface if enough moisture is present. If left untreated, it can spread quickly throughout the appliance. The presence of mold in your refrigerator can cause health problems such as allergies or respiratory issues. It can be especially dangerous for individuals who suffer from asthma or similar conditions. In addition, mold has been linked to several other health risks, including headaches, nausea, skin irritation, fatigue, and even depression.
❌Food Spoilage and Contamination
The main reason why it is important to keep your refrigerator clean is that it reduces the risk of food spoilage and to avoid contamination. When food spoils, bacteria will form on the surface of the food, making it very dangerous to consume. It can lead to food poisoning or other serious illnesses, such as salmonella, if not addressed properly. In addition, a dirty refrigerator can also cause cross-contamination between different types of food items which can lead to further complications.
❌Unpleasant Odors
A dirty refrigerator can also create an unpleasant odor throughout your kitchen or home due to bacteria buildup on the shelves and walls of the appliance. This smell can linger long after cleaning out your fridge and may even attract pests such as ants or roaches into your home, further increasing the chances of contamination. Additionally, this odor could cause discomfort or headaches when inhaled over time, making it necessary to give your fridge some extra attention regularly to keep it smelling fresh and free from any foul odors.
❌Allergens
A dirty refrigerator can also be a source of allergens that can trigger allergies in some people. Dust and dirt accumulate in every nook and cranny of your fridge over time, so if someone who suffers from allergies comes into contact with these particles, they could suffer an allergic reaction.
To avoid this problem, make sure you give your refrigerator a thorough cleaning once every few months to remove any dust or dirt buildup that could trigger an allergic reaction in anyone who comes into contact with it.
How to Clean Fridge Drawers
Refrigerator drawers require frequent cleaning to keep them in top condition and maintain the freshness of your food. Here is a step-by-step guide on properly cleaning and organizing fridge drawers.
?Cleaning Materials
With the right supplies, you can make sure that your fridge drawers are clean and ready for use every time. These are the materials you will need to get the job done:
Dish Soap and Water
The most basic cleaning solution is a mix of dish soap and warm water. Start by putting a few drops of dish soap into a bucket or kitchen sink filled with warm water. Then, use a sponge or cloth to wipe down the interior walls of the refrigerator drawer. You may want to use an old toothbrush to get into those hard-to-reach spots where dirt can accumulate over time.
Vinegar Solution
For more stubborn dirt and grime buildup, create a vinegar solution by mixing white vinegar and warm water in a spray container. Spray the solution onto the surface of the entire drawer before wiping away any dirt with a scrubby sponge or cloth. Use an old toothbrush to scrub away any remaining debris from hard-to-reach places like corners or crevices.
Baking Soda Solution
If there’s still some stubborn debris sticking around after using the vinegar solution, try making a baking soda paste by combining the same amount of baking soda and water in a container until it forms a thick mixture. Spread this paste on problem areas before scrubbing those areas gently with an old toothbrush dipped in warm water.
16-Ounce Glass Spray Bottle
A 16-ounce glass spray bottle is essential for cleaning and disinfecting the surfaces of your refrigerator drawers. Fill this bottle with a vinegar solution and spritz down each drawer’s interior walls before wiping away any residue with a sponge or cloth.
Soft Cloths
Soft cloths are great for wiping away dirt and residue without scratching the surfaces of your refrigerator drawers. Make sure to use different clothes when cleaning each drawer, as this will help prevent cross-contamination between food items.
Old Toothbrush
An old toothbrush is a must-have for cleaning any hard-to-reach spots in your refrigerator drawers. Dip the toothbrush in warm water to remove dirt buildup from crevices and corners inside each drawer.
All-Purpose Cleaner
If you’re dealing with tough stains or sticky buildup, an all-purpose cleaner is the perfect solution. Spray it onto the surface of each drawer and wipe away any residue before rinsing with warm water.
?Clean Crisper Drawers
The crisper drawers in your refrigerator are integral to maintaining a healthy kitchen. Not only do they help keep your fruits and vegetables fresher for longer, but they also help you organize the rest of your food items. Unfortunately, it’s easy to neglect these vegetable drawers and let them become cluttered with expired produce and spills that have gone unnoticed.
Here is how to deep clean and organize your crisper drawers for maximum efficiency:
Step 1: Empty The Drawer
The first step in the cleaning process of your refrigerator crisper drawer is to empty it. Take out all fruits and vegetables and set them aside in a bowl or tray. It will make it easier for you to access all parts of the drawer while you are cleaning it.
Step 2: Disinfect The Drawer
Once the drawer is empty, it’s time to disinfect it. Fill a spray bottle with warm water and add a few drops of distilled white vinegar, then use a small brush or cloth to clean the interior surfaces of the drawer. Be sure to scrub off any stuck-on food residue and any visible mold or mildew spots. Once you have finished scrubbing, rinse off the drawer with clean water and dry with a soft cloth or paper towel.
Step 3: Reorganize The Drawer
Now that your crisper drawer is clean and dry, it’s time to reorganize it so that everything fits neatly inside. If possible, line up items like apples next to each other, so they don’t roll around in their little corner of the drawer!
If there are shelves within the drawer, use them to organize different types of produce, such as hard vegetables on one shelf and softer fruit on another. It will help keep everything organized while also ensuring proper airflow throughout the drawer, which can help extend the life of your products even further!
?Clean Other Drawers
Step 1: Empty and Disassemble the Drawer
Before you start cleaning, remove all the items in the drawer and disassemble them if possible. It will give you access to the nooks and crannies where dirt and bacteria can build up over time. You should also remove any racks or dividers that are inside so that you can properly clean them as well.
Step 2: Scrape Your Drawers
Carefully yet firmly, scrape the drawers’ walls and bottoms. Doing so will remove any vegetable peels or spills accumulated on the drawers. It streamlines the cleaning procedure.
Step 3: Wash with Soap and Water
Once you have scraped as much of the residue away as possible, soak the drawers in hot water to remove any remaining dirt or grime. Add some mild dishwashing soap to the water and use a sponge or cloth to scrub down the interior surfaces of each drawer.
Use a soft cloth or sponge for this process so that you don’t scratch any surfaces or cause any damage to delicate parts of the drawer. If there are stubborn stains or spots, use a gentle scouring pad or clean brush to help loosen them up before wiping them away with a damp cloth.
Step 4: Rinse and Dry
Once you have finished scrubbing your drawers and all the dirt has been removed, it’s time to rinse them off with warm water. Make sure to use a clean microfiber cloth or sponge to wipe away any residue before rinsing with warm water.
Step 5: Dry Thoroughly
After washing everything, dry all parts thoroughly before reassembling the drawer again. Any water left behind can cause mold or mildew growth, which is why it’s important to ensure everything is completely dry before putting back together (or putting food back in). You can use a towel or paper towel if necessary.
?Clean Freezer Drawers
Keeping your freezer drawers clean is essential for maintaining the quality and safety of your food. It is advised to deep clean your freezer every 3-6 months. Here are some steps to follow when cleaning your freezer drawers:
Step 1: Remove Your Drawers
The first step in cleaning your freezer drawer is to remove them from the appliance. It will make it easier for you to reach all the nooks and crannies that might be difficult to get to otherwise. Be sure to wear gloves when doing this, as some freezers may have sharp edges or points that could cut you. Additionally, if your freezer has an ice maker in the drawer, turn off the power before removing it.
Step 2: Clean Out Any Debris
After removing the drawers from your freezer, use a damp cloth or sponge and hot water to wipe away any dirt or debris that may have accumulated inside them. Make sure you pay attention to all surfaces, including the sides and bottom of each drawer. If stubborn spots don’t come off easily, try using baking soda mixed with a small amount of water as a gentle scrubbing agent.
Step 3: Sanitize Your Drawer
Ensure that your freezer drawer is free from harmful bacteria and other microorganisms by sanitizing it after wiping it down. There are several options for sanitizing your drawer, including diluting bleach with water (1 tablespoon per gallon), distilled white vinegar (2 tablespoons per gallon), hydrogen peroxide (2 tablespoons per quart), or antibacterial spray cleaner.
Ensure you wear gloves when handling chemical solutions and rinse the drawer with cold water after sanitizing to remove any residue from the cleaning products.
Step 4: Dry and Reassemble
Once you’ve sanitized your drawer, dry it off with a clean microfiber cloth or paper towel. Once everything is dry, reassemble the drawers in their given slots and turn the power back on if necessary.
Tips on Maintaining Refrigerator Shelves and Drawers

Keeping your refrigerator shelves and drawers organized and clean can help you maintain food safety and extend the life of your appliance. Maintaining order in your refrigerator will be much easier with the right tips and tricks. Let’s explore some tips for keeping your fridge in tip-top shape.
?Clean Your Refrigerator Shelves
The first step in maintaining a clean refrigerator is to clean drawers and shelves. Start by taking out all the items on the shelves one at a time, wiping them down with a damp cloth or paper towel if necessary, and then replacing them in an orderly fashion. It will help you stay organized and ensure everything is easy to find when needed. It is also an opportunity to throw away expired food items or ingredients that may no longer be safe to eat.
?Organize by Category
Organizing items by category helps you find what you need quickly and easily. For instance, you get the idea of drinks in one drawer, fruits and vegetables in another, and leftovers in a third drawer. This way, all of your items are grouped together so they’re easy to locate. You can even take it a step further by labeling each drawer or glass shelf with its contents so everyone knows where to look for specific items.
?Rotate Produce Items
Rotating produce items is the best way to ensure you use everything before it goes bad. Place older items at the front of the shelves and place newer ones behind them. This way, older produce doesn’t get forgotten, while newer items don’t expire too soon either. All you have to do is remember to check on your produce now and then!
?Sort Into Containers
Sorting into containers helps keep things neat in the refrigerator. Instead of having loose items rolling around from shelf to shelf or drawer to drawer, use containers or bags to group them and keep them in place. Plus, it’s easy for everyone in the household to grab what they need without scattering the contents of an entire shelf or drawer everywhere!
Ensure that each drawer is closed tightly after use so that the cold air doesn’t escape from the fridge and that no new odors can enter from outside sources.
?Allow Your Fridge to Cool
To ensure all food is safe to consume, use a fridge thermometer and wait until the temperature inside the refrigerator drops below 5°C before replacing your groceries. Take advantage of the fast-cool functions available on many fridges for faster cooling times!
?Eliminate Odors
Keep your refrigerator smelling fresh and clean by placing a small bowl of baking soda inside. Replenish the solution every three months for optimal effectiveness. Don’t forget to label it with the date, so you remember when! Baking soda can also be sprinkled onto drawers or side shelves for an extra burst of freshness.
?Don’t Overload Your Fridge
Remember not to overload your shelves or drawers with too many items. It can cause them to break and make it harder for air to circulate within the fridge and keep all food cool. It also makes it more difficult to find what you’re looking for!
Frequently Asked Questions
What are drawer liners?
Refrigerator drawer liners are essential for keeping your refrigerator neat and organized. They come in various sizes and materials to suit any interior needs. There is non-slip rubber that prevents vegetables from sliding off the shelf during transportation, and moisture-proof paper is good for storing wet items like fish or fruit without having them stain other food or affecting the taste.
These versatile liners make it possible to securely place items in the drawers, keeping them from getting lost or tucked away somewhere in forgotten corners of the fridge. A refrigerator drawer divider effectively protects the shelves of your fridge while also making it easier to find what you need when searching for specific foods and ingredients.
How do I prevent fridge drawers from getting dirty?
The best way is to line the inside and bottom of each drawer with a layer of plastic wrap or wax paper. Not only will this protect the surface from direct contact with food, but it also helps keep stains to a minimum. Additionally, it’s important to go through your fridge at least once a week and throw out any expired items. By frequently rotating foods, you’ll find it easier to keep your drawers clean and fresh.
How to clean your fridge drawer that smells?
If you don’t have vinegar or baking soda, ground coffee and activated charcoal are efficient substitutes to deodorize your refrigerator. Just spread it on a tray and wait for the bad smells to dissipate after a few days. Alternatively, try utilizing lemon halves or orange peels instead. Simply place them face down on one of the shelves for an aromatic citrus aroma!
How to take apart a refrigerator drawer?
Unplug the refrigerator from its power source and locate the drawer screws on either side of the drawer. Using a screwdriver, remove both screws and carefully slide the drawer out of its frame. Then, using a flat-headed screwdriver, pry off the plastic trim piece around the outside edge of the drawer. Gently pull apart the drawer edges, exposing all of its internal components for disassembly or cleaning.
While taking apart a refrigerator drawer can be intimidating at first glance, it can be accomplished quite easily with a few basic tools and patience.
How to remove crisper drawers?
Clean out your vegetable and fruit crisper drawers by pulling them until they reach the stop position. Then slightly tilt the pan up while simultaneously pulling it straight out of its spot. To remove some refrigerator drawers, you may have to swing open its fresh food door (or doors) more than 90 degrees. Slightly tilt the drawer on its outer edge and gently pull it straight out.
When replacing refrigerator drawers, line them up precisely with their grooves and push in firmly until you hear a click or snap. It will ensure that your crisper drawers remain securely in place.
Final Words
Keeping fridge drawers clean and orderly is essential for a healthy kitchen. With the right tools and steps, it’s easy to achieve a clutter-free, germ-free fridge environment. Keep in mind that regularly cleaning the refrigerator can maintain its cooling efficiency. Furthermore, cleaning and pest control are two completely different topics. Not being able to fix one with the other can result in expensive repairs or even food poisoning in severe cases.
Lastly, once you’ve finalized your cleaning routine, don’t forget to organize the refrigerator’s contents. Place frequently used items within easy reach, so you don’t have to dig through the entire space whenever you need something. You’ll thank yourself later! With a cabinet full of helpful products and specific maintenance practices such as these, keeping your fridge fresh and functional is simple and achievable.